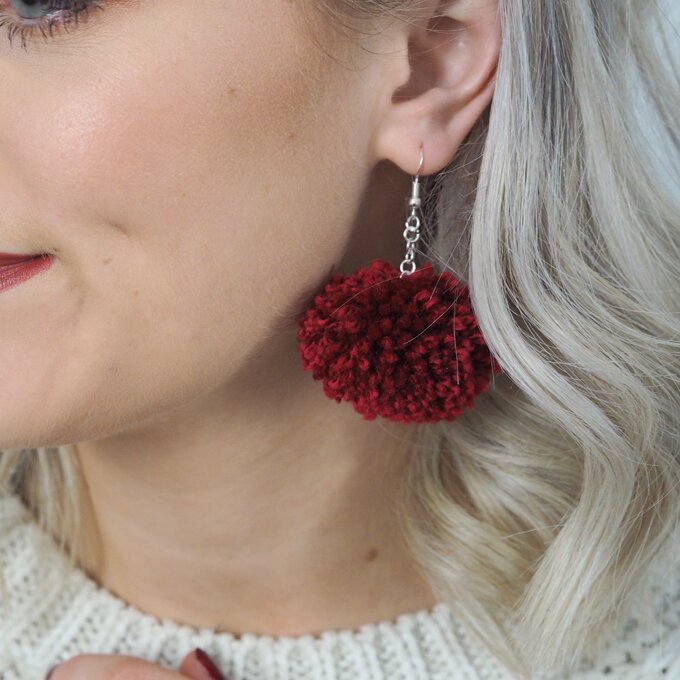
Does my pom look big in this..?
It’s the first day of this year’s #MadeUpFestive challenge, and I’m kicking it off in style…
I’ve been wanting to make some pom pom earrings for YEARS, so what better time to get my festive DIY on than the run up to Christmas. These simple and fun earrings make the perfect accessory for the party season. Or how about a DIY stocking filler for a friend? They only take around half an hour to whip up and can be made in a variety of colour combinations.
If you want to make your own, here’s how I made my DIY pom pom earrings
Materials:
Yarn, StyleCraft
Earring hooks and jump rings, Amazon
Pliers
Small pom pom maker, Amazon
Scissors


Making the pom poms
Start by choosing the size of pom pom you want on your earrings. I went for the smallest size pom pom maker, which makes a ball approx 4 – 5cm.
I love using pom pom makers as they’re super quick and easy to use. If you haven’t used one before, check out this project for a bit of practice.
Here’s how I did it: 1. Start by opening out the arms on the pom pom maker. Then wrap the yarn around one arm until it’s nice and full.
2.Fold the arm back to middle.
3. Wrap the yarn around the other arm until it’s full again and fold back to the middle.
4. Using small sharp scissors, cut the yarn straight down the middle on both sides.
Keeping the arms of your pom pom maker closed, wrap a length of yarn around the gap in the middle and tie tight. This will secure the yarns in place, meaning you can open your pom pom maker and release the ball. I like to trim my pom pom to tidy up any loose ends and even out the shape. Don’t trim the yarn used to tie the pom pom in the middle, as this will be used to connect the earring part later. Make a second pom pom in the same way.


Adding the earring
To make the metal part of your earring, take one of the jump loops and create a small opening in the loop using pliers. Connect it to the loop on bottom of your earring hook and squeeze the loop closed with pliers. Add another 7 loops in the same way to create a long chain to hang your pom pom from.
Attach your pom pom by passing the long lengths of yarn through the last ring in the chain and tying tightly. I made a couple of knots before sewing the yarns back though the middle of my pom pom using a large sewing up needle for extra security.
Top tip: You can always make your pom pom earrings longer or shorter depending on your preference by adding more or less loops to the chain.


What do you think? I’d love to hear if this post has made you want to make your own DIY pom pom earrings this Christmas. What colour would you make yours in? Leave me a comment below or chat to me over on Twitter and Instagram.
Anna x
Want to make more?
Make your own pom pom stocking
This post contains affiliate links.
Pin for later?

This is such a cute idea! It makes me want to make some for my boyfriend’s mum!
It’s so pretty! Love these pom-pom earrings. Thanks for sharing a great informative tutorial.